Importing Contacts Using a CSV File
When we refer to .CSV files, these are essentially Excel files, saved with a particular setting that makes them easier for web applications to work with. CSV, if you're curious, stands for "comma separated values."
How to prepare your CSV file to upload into Karani
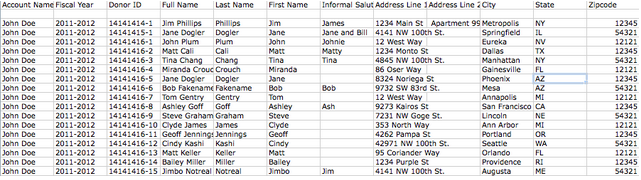
When you're importing contacts using a CSV file, it's most helpful to have a CSV with the column titles first name, last name, address, phone number, city, state, zipcode, and any other contact info you want to include.
Some helpful things to keep in mind:
- First name and last name should each have their own columns
- Address, city, state, and zipcode should each have their own columns
- If you do not have a Donor ID provided by your organization you can use anything unique to that contact, such as an email.
If your CSV looks like the one below, you'll be good to go.
Once your spreadsheet is ready, export it as a CSV. In Excel, you'll want to go to "File" and click "Save as."
Change the "Format" to "Comma Separated Values (.csv)" then click "Save."
Your CSV is now ready to be uploaded to Karani.
How to import your contacts using a CSV file into Karani
Go to the import page in Karani.
Click on "contacts" under the heading ".CSV Importer"

Click "choose file" to the right of where it says "Upload CSV"

Navigate your computer to find the CSV file you prepared to upload into Karani.
Choose the CSV file you want to upload, click "Open" then click "Submit" to upload the file to Karani.
If the CSV was uploaded correctly, you'll be taken to this screen:
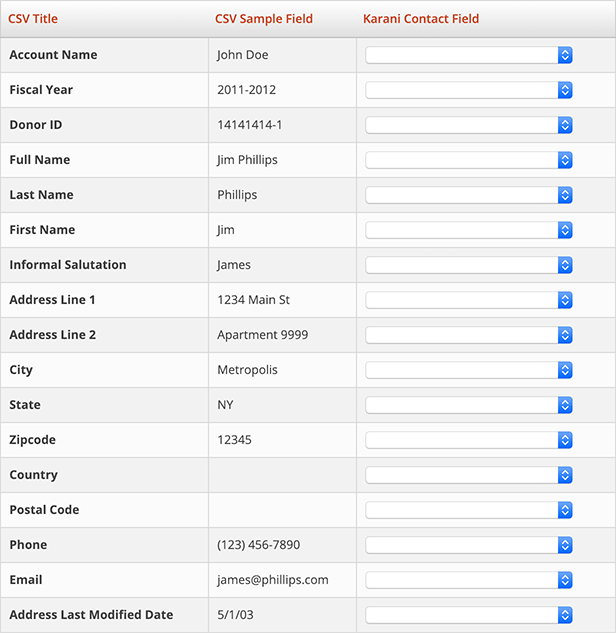
Match the fields on the right hand side using the dropdown boxes (donor ID = organization ID) with the fields on the left hand side.
You can assign multiple fields to the same Karani field and they will all get added together. Example: If you assign ''Fiscal Year'' and ''Address Last Modified Date'' to the ''Notes'' Karani contact field, then the ''Fiscal Year'' and the ''Address Last Modified Dates'' will be added together in the ''Notes'' section after you process your CSV.
Here's what a completed version of the above screenshot looks like:
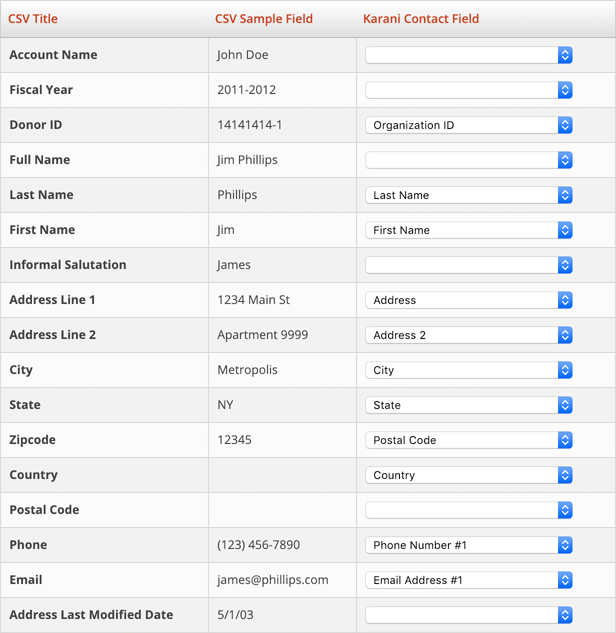
Click "Process CSV" and you're done!